Canvas has two types of Groups: Student Groups & Group Sets. Student Groups can be created by either the instructor or a student, and are self-organized. Group Sets are created by the instructors and are used for graded assignments.
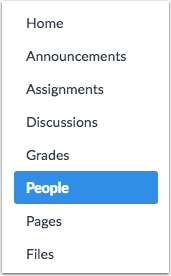
- Groups can be created, accessed, and managed by clicking the People link on the Course Navigation Menu.

- On the People Page, instructors can view, create, and manage the course groups. Groups can be self-enrolled for students, or the instructor can manually or automatically assign students to a group. Instructors can also easily reassign students to specific groups, if needed. A student may be assigned as a Group Leader, which allows that student to manage the group and group users.
- To view groups, click the People "Settings" icon
- Select "View User Groups" from the Settings Menu
- Click on an existing Group Set name
- Instructors can view each groups home page by clicking the Settings icon to the right of the group to be viewed.
- Select "Visit Group Homepage" from the menu. The Settings menu also allows instructors to Edit and Delete the Group Set.
- The Group Homepage displays all recent activity of the group. The Group Homepage navigation menu provide links to all of the course tools available to the group, which may include Home, Announcements, Pages, People, Discussions, Files, Conferences, and Collaboration.
- The Switch Group link allows the user to easily navigation from one group homepage to another. Simply select the new group to be viewed.
- The Edit Group button allows instructors to edit a group from the Group Homepage.
Best Practice:Students have a Groups link on the Global Navigation Menu on the left side. When clicked, the Groups link will display and provide access to all groups that the student is member of from every course they are enrolled in. A best practice is to name any course groups with an abbreviation of the course name, then the group name (e.g. Hist 101 - Group 1, Acct 200 - Financial Wizards, Engl 220 - Literary Pros, etc.). This will help the students easily identify and differentiate their groups from course to course.
Important:
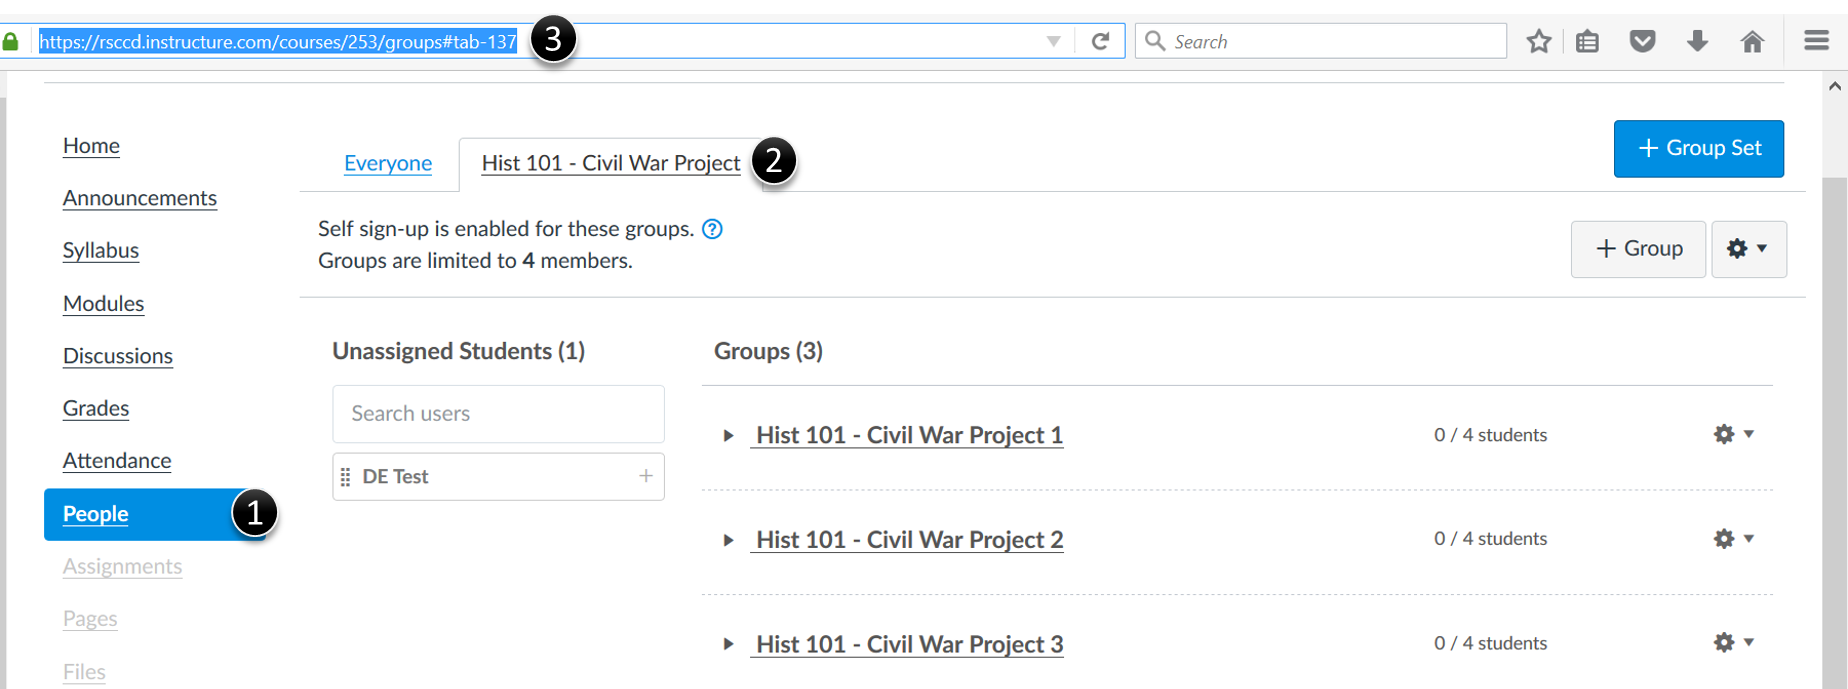
If students will be self-enrolling in a group, instructors will need to provide a URL to the Groups tab in People on their instruction page for the group. To get the Groups Tab URL, click the People (1) link on the Course Navigation Menu, then click the tab of the self-enrolled group (2). Highlight the entire URL (3) in the address bar, then paste the link into the instruction page. This will provide students with to access the Group page to self-enroll.

Pronto Group
Pronto is a communication tool that integrates directly into Canvas and provides students with a more immediate and direct experience. Students can direct message with each other in the course they are enrolled in, as well as post a question or comment to the class
What's it's good for:
- Posting a general question about an assignment or upcoming test
- Seeking or providing clarification about anything related to the class
- Sharing a super cool/interesting article or video pertaining to a topic we're learning about
- Seeking to study together
- Sharing an experience directly connected to a topic of the class or
sharing about trying out something you learned from the class and what
happened.
- Helping each other by answering each other's questions
Creating a Group Chat (ie: a study group): To create a private conversation with multiple students:
- To access Pronto, click on "Pronto" app on Global Navigation Menu

- Expand the Pronto window by clicking on the small square with the arrow pointing top right, this will open Pronto in a new window tab.
- Once the new window tab opens, click on the "Green + Sign" at the bottom left screen, and click on "Create Group"
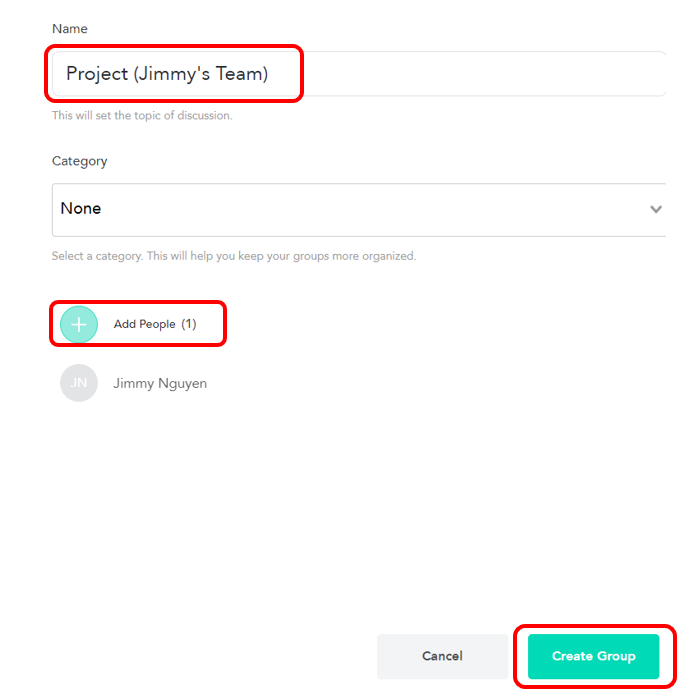
- Once you've clicked on "Create Group", name the group with something short like the topic or some other name that characterizes the group. Category is optional. Click on "Add People" to add group members. Select "Create Group" once all group members are added.

Additional Resources on Groups
